Is Slurry Coating Right for Your Driveway?
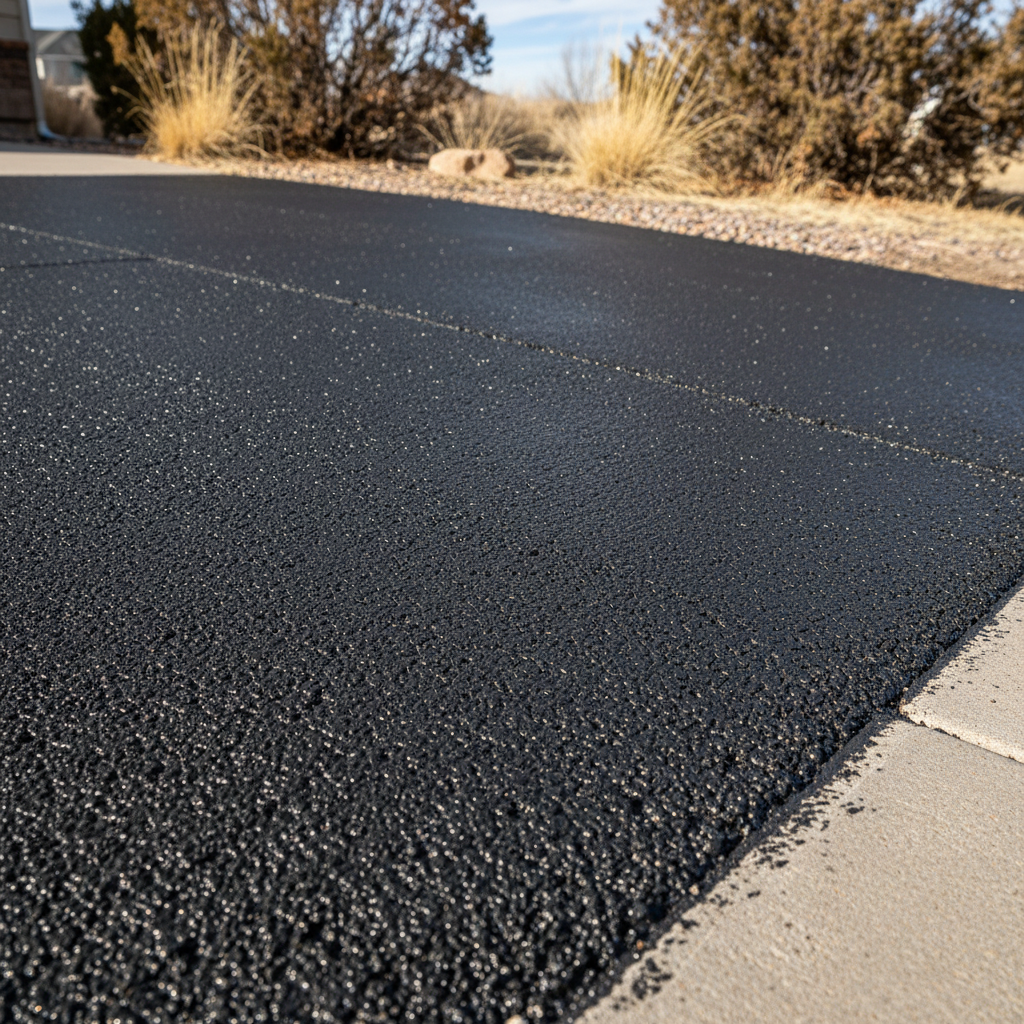
Let's talk about slurry coating. You've probably seen it – that fresh, dark black finish on driveways around Brighton. It's not just about making things look good, though that's a big part of it. Slurry coating, sometimes called sealcoating, is a protective layer for your asphalt. Think of it like sunscreen for your driveway. It helps shield the asphalt from UV rays, water, and oil spills, which can really break down the surface over time.
Now, is it right for *your* driveway? If your asphalt is relatively new, say less than 5-7 years old, and in good shape – meaning no major cracks, potholes, or crumbling sections – then a slurry coat is a fantastic way to extend its life. It fills in tiny hairline cracks and gives it a uniform, clean look. If your driveway is older, heavily cracked, or has significant damage, you're probably looking at repairs first, maybe even resurfacing, before a slurry coat will do much good. Putting a band-aid on a broken leg doesn't fix the leg, right?
Before You Start: Prep Work is Key
Whether you're doing it yourself or hiring someone, the prep work is probably the most crucial step. Seriously, don't skimp here. I've seen too many DIY jobs go south because folks rushed the prep.
Clean, Clean, Clean: You need to get your driveway spotless. Sweep off all loose dirt, leaves, and debris. Then, power wash it. Get rid of any oil stains – a good degreaser and a stiff brush will be your friend here. Make sure it's completely dry before you even think about applying the slurry.
Deal with Weeds: Any weeds growing in cracks need to go. Pull them out, hit them with a weed killer, whatever it takes. If you don't, they'll just grow right through your nice new coating.
Patching Small Cracks: For hairline cracks, the slurry might fill them. But anything wider than a quarter-inch, you'll want to fill with an asphalt crack filler *before* you apply the slurry. Follow the product instructions for drying times – usually 24 hours or more.
Edge Control: Protect any adjacent concrete, pavers, or garage doors with painter's tape or plastic sheeting. You don't want black goo on your nice concrete patio.
DIY Slurry Coating: What You'll Need & How to Do It
Okay, so you've decided to tackle it yourself. Good for you! It's definitely a project you *can* do, but it's a lot of work. Here's the rundown:
Materials: You'll need the slurry coating itself (check the coverage rates – you'll usually need more than you think), a squeegee or a special sealcoat brush, a stir stick, and protective gear (gloves, old clothes, eye protection). You can usually find these at your local hardware store or home improvement center.
Weather Watch: This is huge, especially here in Brighton. You need at least two days of consistently warm, dry weather. No rain in the forecast, and temperatures should be above 50°F and ideally not scorching hot. Early mornings or late afternoons are often best to avoid direct, intense sun that can make the product dry too fast.
Application: Mix the slurry thoroughly. Pour a manageable amount onto your driveway, starting at the highest point and working your way down. Use the squeegee or brush to spread it evenly and thinly. Don't go too thick – multiple thin coats are better than one thick, uneven one. Work in sections, making sure to overlap slightly to avoid lines. Keep a wet edge. Most products recommend two coats, with several hours (or even a full day) of drying time between them.
Curing Time: This is the hardest part for most folks: STAY OFF IT. You'll need to keep cars off for at least 24-48 hours, sometimes longer depending on the product and weather. Foot traffic might be okay after 12-24 hours. Rushing this will ruin all your hard work.
When to Call Asphalt Excellence (or Another Pro)
Look, I'm all for saving a buck and doing things yourself. But sometimes, it just makes more sense to call in the pros. Here's when I'd say it's time to pick up the phone:
Large Driveways: If your driveway is massive, like those long ones you see out in the Brighton Crossings area, doing it yourself is a huge undertaking. It's physically demanding, and keeping a consistent, even coat over a large area is tough.
Significant Damage: If you've got more than just a few hairline cracks – we're talking alligator cracking, potholes, or large sections of crumbling asphalt – you need more than just a slurry coat. A professional will assess the damage properly and recommend the right repairs, which might include patching, crack filling, or even an overlay.
Time Constraints: Don't have a full weekend to dedicate to cleaning, patching, coating, and waiting? Pros can get it done efficiently and correctly.
Quality & Longevity: We use commercial-grade materials and equipment that aren't available to the average homeowner. This means a more durable, longer-lasting finish. Plus, we've got the experience to handle those tricky spots and ensure an even application every time.
Peace of Mind: Let's be honest, sometimes it's just nice to know it's done right, without you breaking your back or worrying about the forecast. We deal with the unpredictable Colorado weather all the time, so we know how to plan around it.
Ultimately, the decision is yours. A DIY slurry coat can be a rewarding project if your driveway is in good shape and you're prepared for the work. But for bigger jobs, or if you just want the best possible finish and protection for your investment, giving us a call at Asphalt Excellence is always a smart move. We're happy to give you an honest assessment of your driveway's condition and what it really needs.